DIY attic insulation is one of the highest-return home improvement projects you can tackle yourself, typically costing $500 to $1,500 in materials for an average attic versus $1,500 to $3,500 for professional installation. Sealing air leaks before adding insulation is critical, most homeowners in climate zones 4 through 7 should reach R-49 to R-60, and blown-in cellulose is the most beginner-friendly method for existing attics with irregular framing or obstacles.
Key Takeaways
- Air sealing before you insulate can reduce heating and cooling costs by up to 20%, according to the U.S. Department of Energy, and takes only a few hours with caulk and spray foam.
- Blown-in cellulose runs roughly $0.25 to $0.50 per square foot in materials, making it the most cost-effective DIY option for most attic sizes between 1,000 and 1,500 square feet.
- The federal Section 25C tax credit covers 30% of insulation material costs (up to $1,200 per year) for qualifying products, and DIYers claiming materials-only are fully eligible.
- Fiberglass batts work best in open, unobstructed joist bays; blown-in works better around wiring, pipes, and irregular framing typical of older homes.
- Never cover recessed light cans or block soffit vents with insulation, both create fire hazards and moisture problems that can cost far more to repair than the insulation saves.
Why Attic Insulation Is the Best Place to Start a DIY Energy Upgrade
The attic is responsible for up to 25% of a home’s heat loss in winter, making it the single most impactful area to address before touching walls, windows, or doors.
Heat rises. In an under-insulated home, that means conditioned air you paid to heat or cool escapes straight through the ceiling into the attic and out through the roof deck. The Department of Energy consistently ranks attic insulation as the number-one DIY upgrade for energy savings, ahead of door weatherstripping, window film, and even smart thermostats.
The math is compelling. A typical 1,200-square-foot attic with R-11 insulation (common in homes built before 1980) upgraded to R-49 can cut annual heating and cooling costs by $200 to $600 depending on your climate zone and local energy rates. The payback period for a DIY project is typically two to four years, after which the savings are pure return. Beyond cost, the comfort difference is noticeable within the first heating season. Rooms directly below the attic hold temperature more evenly, drafts reduce, and HVAC systems cycle less.
One editorial note worth flagging: many homeowners focus on adding more insulation when the real problem is air leakage. Insulation slows heat transfer, but it does not stop air movement. A home with R-60 insulation and unfilled penetrations around electrical boxes, plumbing chases, and attic hatches will still lose significant energy. Air sealing is not optional — it is the first step.
What You Need Before You Start: Safety Gear, Tools, and Materials
Gather your safety equipment and materials before climbing into the attic, because once you’re up there surrounded by insulation and tight spaces, running back to the hardware store is not a realistic option.
Protective Gear You Cannot Skip
Attic work exposes you to fiberglass particles, cellulose dust, and potential mold or pest residue in older homes. At minimum, you need an N95 respirator (not a basic dust mask), safety glasses or goggles, a long-sleeve shirt, work gloves, and knee pads. If you’re working with blown-in insulation, a full-face respirator is worth the upgrade. Renting an insulation blower from Home Depot or Lowe’s typically costs $0 to $50 when you purchase a minimum quantity of insulation bags, usually 10 bags or more.
Tools for Air Sealing
For the air sealing phase, you need expanding spray foam (Great Stuff Pro or equivalent) for gaps larger than 1/4 inch, fire-rated caulk for penetrations near electrical boxes, a utility knife, and a high-lumen LED work light or headlamp. A stud finder and measuring tape help map the joist layout before you start crawling around in the dark.
Choosing Your Insulation Type
There are three practical options for a DIY attic floor project. Blown-in cellulose is recycled paper treated with borate fire retardant, easy to install to an even depth, and scores well on environmental impact. Blown-in fiberglass is lighter, slightly more expensive, and maintains R-value better in very cold climates. Fiberglass batts (rolls or pre-cut sections) are the most familiar format and work well in unobstructed joist bays, but they compress easily and lose R-value if you tuck them too tight. For most homeowners with older homes, irregular framing, and a mix of wiring and plumbing runs, blown-in cellulose is the most forgiving choice.
How to Seal Your Attic Before Adding Any Insulation
Air sealing is the step most DIY guides treat as a footnote, but skipping it means your new insulation is working against a problem it cannot fully solve.
Finding and Prioritizing Air Leaks
Start at the attic floor, not the roof. The biggest air leakage points in a typical attic are, in order of priority: top plates (the framing where interior walls meet the attic floor), plumbing vent stacks, electrical wire penetrations, attic hatch frames, recessed light fixtures, and HVAC ducts. You can feel significant leaks on a cold day by moving your hand slowly over insulation and feeling for temperature differences. A blower door test, available from most energy auditors for $100 to $300, gives you a precise air changes per hour (ACH) number and can pinpoint leaks using a smoke pencil or thermal camera. It is not required, but it removes guesswork, especially in homes built before 1990.
Sealing Each Penetration Correctly
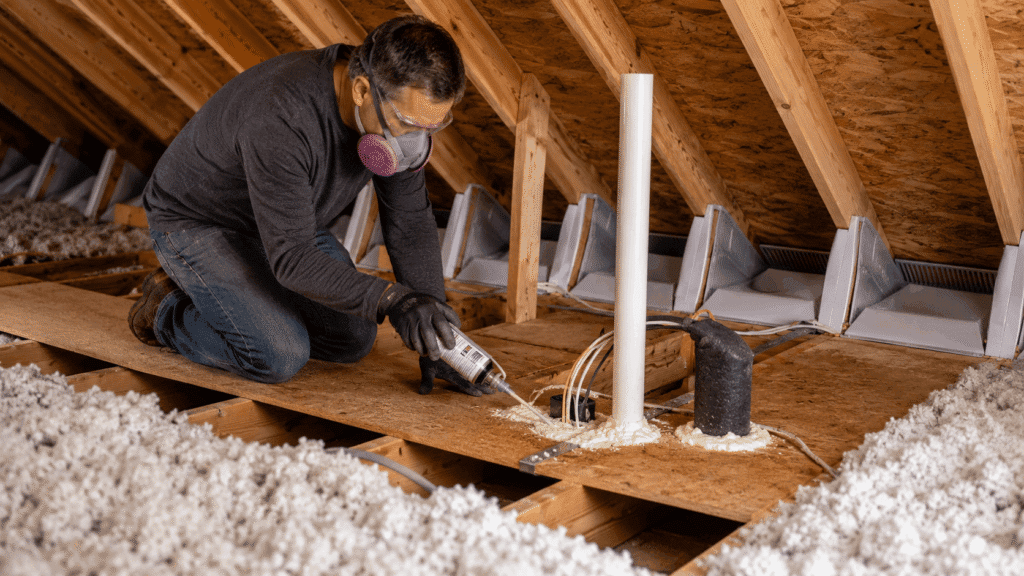
Use fire-rated caulk or intumescent foam around electrical boxes — never standard expanding foam, because standard foam is not fire-rated. For gaps around plumbing stacks and wiring runs, low-expansion foam like Great Stuff Gaps and Cracks works well for openings under 3 inches. Larger gaps around chases or dropped soffits need rigid foam board cut to fit and sealed at the edges with foam. Recessed light cans require a purpose-built airtight cover (sometimes called an IC cover or “hat”) installed from the attic side before any insulation goes over them. This is non-negotiable: covering a non-IC-rated recessed light with insulation creates a fire risk and violates most building codes. Attic hatches and pull-down stair assemblies are often overlooked and are among the worst offenders for air leakage. Weatherstrip the hatch frame and add rigid foam board or a pre-made insulated attic stair cover rated at R-38 or better.
How to Install Blown-In Attic Insulation: Complete Step-by-Step Guide
Blown-in cellulose or fiberglass is the most practical choice for most attic floors because it fills around wires, pipes, and joists without cutting or fitting, and rental blowers make the job accessible to any homeowner willing to spend a Saturday. The process breaks into five stages: calculate, prep, seal, blow, and verify.
Step 1: Calculate How Much Insulation You Need
Measure your attic floor area in square feet. Then determine your target depth based on your climate zone and insulation type:
- Blown-in cellulose at R-49 (climate zone 5): plan for roughly 14 to 16 inches of settled depth.
- Blown-in fiberglass at R-49 (climate zone 5): plan for roughly 18 to 20 inches of settled depth — fiberglass is less dense than cellulose.
A bag coverage chart is printed on every bag and posted on the manufacturer’s website. Buy 10 to 15% more than your calculation suggests, because settled depth is always slightly less than blown depth. Unopened bags can typically be returned.
Step 2: Prep the Attic
Pull on a respirator rated N95 or better, safety glasses, and disposable coveralls — attic air carries fiberglass particles, cellulose dust, and potentially decades of rodent debris. Lay plywood scraps across the joists so you have stable footing without stepping through drywall. Bring up a headlamp, a measuring tape, and depth gauge sticks (paint stir sticks with a line marked at your target depth work fine). Staple them to joists every 6 to 8 feet across the attic floor — these give you a visual reference as you blow.
Step 3: Air Seal All Penetrations
Every penetration — top plates, plumbing stacks, electrical boxes, recessed lights (unless IC-rated and airtight), and any gaps where framing meets drywall — needs to be sealed before insulation goes down. Use canned low-expansion spray foam for gaps under three inches, and fire-rated acoustical sealant or foam board cut-pieces for larger openings. Budget at least two to four hours on air sealing alone for a typical 1,000-square-foot attic floor. This step is where most DIY attic insulation projects either earn or lose their energy savings.
⚠ Never cover recessed light cans with insulation unless they are IC-rated (Insulation Contact) and airtight-rated. Standard cans vent heat into the attic — covering them creates a fire hazard. Build a sealed box of fire-rated drywall around each non-IC can, or replace fixtures with IC/AT-rated units before insulating.
Step 4: Install Soffit Baffles
Install cardboard or foam rafter baffles (also called ventilation channels or AccuVent baffles) at every eave bay, stapled to the roof deck. These maintain the required 1-inch air channel from soffit to ridge and prevent insulation from blocking ventilation. Without baffles, blown material migrates into soffits, traps moisture, and can cause insulation to compact and grow mold — sometimes within a single winter. Baffles are inexpensive and take minutes to install; skipping them is a false economy.
Step 5: Set Up and Run the Blower
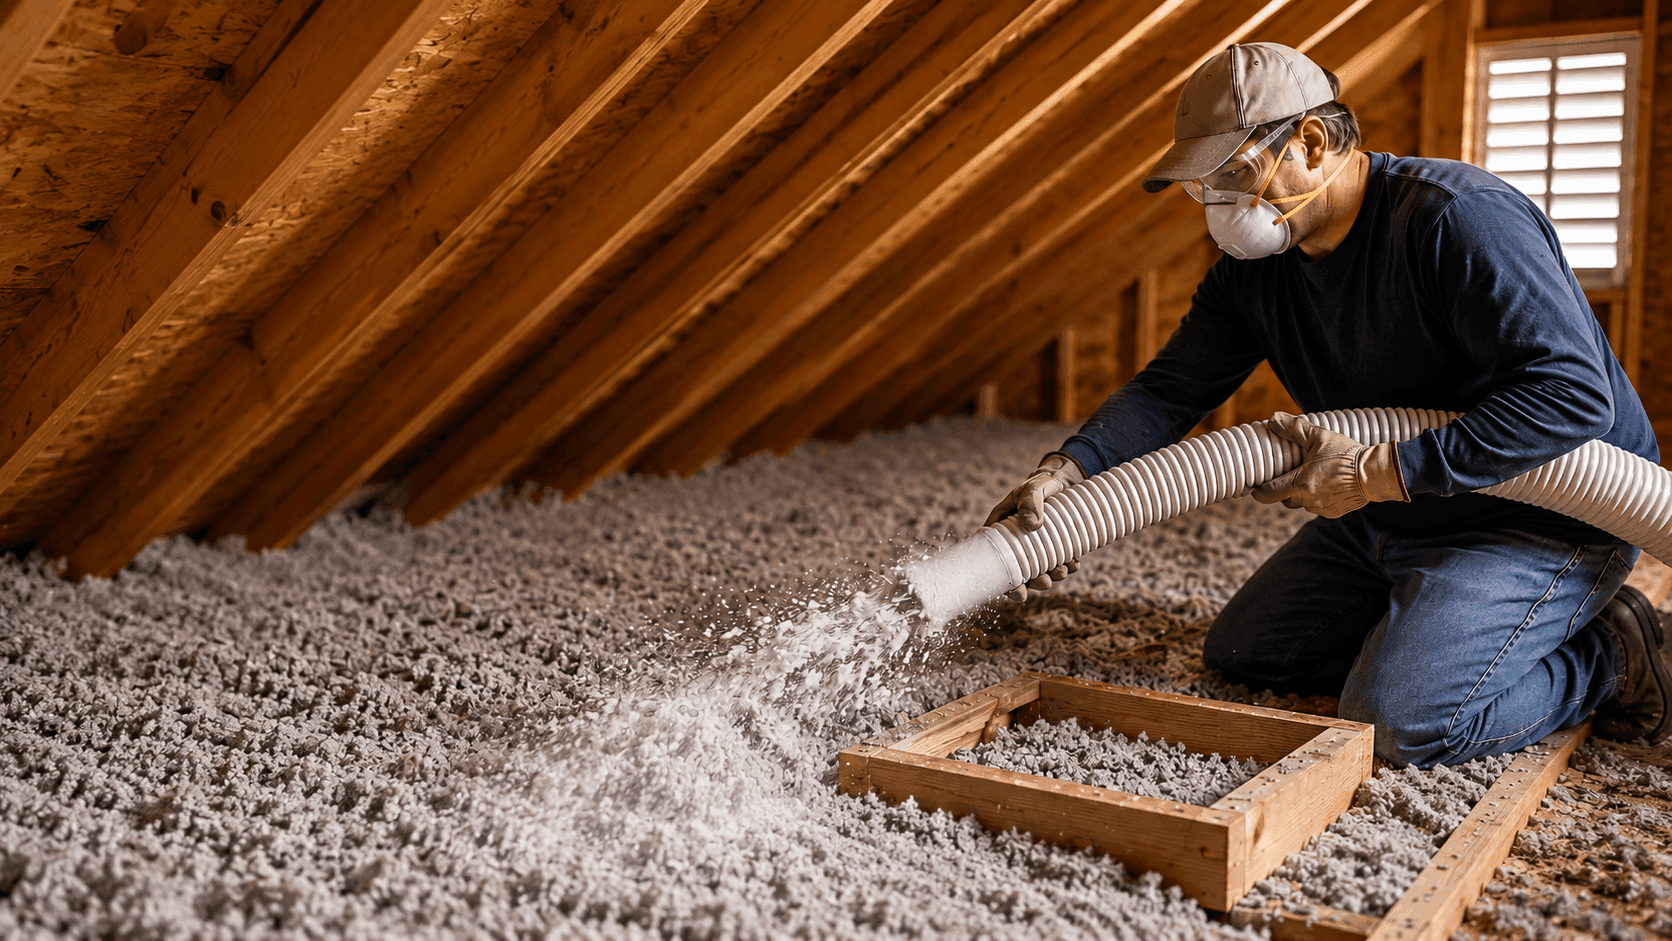
The rental blower connects via a 100-foot hose that runs from the machine (typically left in your truck or driveway) up through a window or door and into the attic access hatch. Have a second person feed bags into the hopper outside while you direct the hose inside. Start at the far end of the attic and work backward toward the hatch so you’re never walking on freshly blown insulation. Keep the hose end 6 to 12 inches above the joist surface and move it in slow, overlapping arcs. Check your depth gauge sticks frequently — cellulose settles roughly 20% after installation, so blow to the settled-depth mark indicated on the bag chart.
Step 6: Verify Coverage
Walk through with a flashlight held low and parallel to the surface, which reveals thin spots, uncovered joist edges, and any areas where the hose pulled material back. Fill gaps by hand from bags rather than re-running the blower for small corrections. Mark the final depth with a permanent ink line on several joists as a reference for anyone who enters the attic in the future.
DIY Attic Insulation Cost Breakdown by Method
Understanding material and rental costs by insulation type helps you budget accurately and compare the real savings from doing the work yourself versus hiring a contractor.
| Insulation Type | Material Cost (per sq ft) | DIY Total (1,200 sq ft) | Pro Installed (1,200 sq ft) | Typical R-Value |
|---|---|---|---|---|
| Blown-in cellulose | $0.25–$0.50 | $300–$600 | $1,200–$2,000 | R-38 to R-60 |
| Blown-in fiberglass | $0.40–$0.70 | $480–$840 | $1,400–$2,400 | R-30 to R-60 |
| Fiberglass batts (unfaced) | $0.30–$0.55 | $360–$660 | $1,000–$1,800 | R-30 to R-49 |
| Spray foam (rim joists only) | $1.00–$2.50 | $120–$300 (partial) | $500–$1,200 | R-6–R-7 per inch(~R-42 at 6 inches total) |
| Rigid foam board (hatch covers) | $0.50–$1.20 | $30–$80 (per hatch) | $150–$400 | R-5–R-6.5 per inch(~R-38 at 6–7 inches total) |
All figures are 2025–2026 US market estimates. Costs vary by region, store, and seasonal demand. For spray foam and rigid foam board, R-value is listed per inch of thickness — a typical 6-inch rim joist application of closed-cell spray foam reaches approximately R-42. Tax credit value is calculated separately on qualifying materials, not labor, which benefits DIYers directly since there is no labor cost to separate out.
Common DIY Attic Insulation Mistakes That Erase Your Savings
Skipping air sealing is the single most expensive mistake homeowners make on attic insulation projects. A well-insulated attic with air leaks still loses enormous amounts of conditioned air; the insulation raises your R-value on paper while unsealed top plates funnel stack-effect air losses every hour of every day. Studies cited by the U.S. Department of Energy consistently show that air sealing paired with insulation outperforms insulation alone by a significant margin in real-world energy reduction.
Blocking soffit ventilation can cost more to fix than the insulation saved. When cellulose or blown fiberglass fills up to the eave without baffles, moisture from the living space condenses in the cold attic and saturates the insulation, causing it to compact, grow mold, and drop R-value — sometimes within a single winter.
Covering recessed lights that are not IC-rated and airtight-rated is a fire and carbon monoxide hazard. Standard recessed cans are designed to vent heat into the attic. If your home has older recessed lights, either replace them with airtight IC-rated units before insulating, or build a sealed box of fire-rated drywall around each one and caulk the edges. Do not simply pile insulation over standard cans.
Insulating the attic floor when you use the attic as conditioned storage is a different kind of mistake. If HVAC equipment, ducts, or a finished room sits in the attic, you may need to insulate the roof line (cathedral-style) rather than the floor. Insulating the floor in that scenario leaves your ductwork in an unconditioned space, which can reduce system efficiency dramatically in both summer and winter.
Finally, many homeowners underestimate the number of bags needed and run short mid-job. Most blower rental programs include a bag-count estimator based on square footage and target R-value — use it, then buy ten percent more than the estimate.
How to Claim Tax Credits and Stack Rebates on a DIY Attic Insulation Project
The financial case for DIY attic insulation is stronger right now than it has been in years, but the rules governing available incentives are specific enough that understanding them before you buy materials can meaningfully change what you actually pay out of pocket.
Federal Section 25C Tax Credit
The federal incentive most relevant to attic insulation is the Section 25C Energy Efficient Home Improvement Credit, part of the Inflation Reduction Act framework. For qualifying insulation materials purchased and installed in a primary residence, homeowners can claim a tax credit equal to 30% of the cost of materials, up to a $1,200 annual cap for insulation and air sealing products combined. This is a credit, not a deduction — it reduces your tax bill dollar for dollar. The credit covers materials only, with no labor component required, which means DIY installers face no complicated separation of costs. Your receipts for cellulose bags, spray foam cans, and foam baffles serve as your documentation. According to the ENERGY STAR program, qualifying insulation must meet the International Energy Conservation Code standards in effect for your climate zone at the time of installation; most bagged cellulose and blown fiberglass products at major retailers already carry this certification on the package.
To claim the credit, file IRS Form 5695 with your federal return for the tax year in which the materials were purchased and installed. Keep your receipts and any manufacturer certification statements — these are not submitted with the return but you need them in case of audit. The credit can be claimed every year you make qualifying improvements, up to the annual cap.
State Tax Credits and Weatherization Programs
State-level programs layer on top of the federal credit and vary considerably. Some states offer their own income tax credits for energy efficiency improvements. The DSIRE database (dsireusa.org) is the most comprehensive resource for finding state and local incentives — search by state and category to find current program rules, since these change regularly with legislative sessions. The federal Weatherization Assistance Program (WAP) covers both materials and labor for income-qualified households, though it is typically administered through contractors. The IRA-funded HOMES rebate program has also been rolling out through state energy offices in 2025–2026, providing additional rebates based on predicted energy savings — check your state energy office for availability in your area.
Utility Rebates: Read the Fine Print
Utility rebates add a third layer, and this is where DIY homeowners need to read the fine print carefully. A meaningful number of utility rebate programs require that insulation be installed by a certified contractor — sometimes a Building Performance Institute (BPI) or RESNET-certified professional — to qualify. If a program requires contractor installation and you self-install, you are not eligible regardless of how well the job is done. Before purchasing materials, pull up your utility company’s rebate program page or call their energy efficiency line and ask directly whether self-installed attic insulation qualifies.
When a utility rebate is available for DIY work, it typically takes one of two forms: a direct rebate check mailed after you submit an application with receipts, or an instant rebate applied at point of sale at participating retailers. Note that the federal tax credit applies to the price you actually paid after any instant rebate, not the pre-rebate price.
Stacking All Three
Combining all three — federal credit, state credit, and utility rebate — is legal and encouraged. A homeowner spending $600 on qualifying insulation materials in a state with its own 15% credit and a $75 utility rebate could realistically net a federal credit of $180 (30% of $600), a state credit of $90, and the $75 rebate, reducing the effective material cost to roughly $255 before any energy savings. Program funding caps and annual authorization cycles mean rebate pools can exhaust mid-year, so acting earlier in the calendar year generally improves your chances.
Wrapping Up Your DIY Attic Insulation Project
A well-executed DIY attic insulation project — one that combines thorough air sealing with the right R-value for your climate zone — is one of the highest-return home improvement investments available to a homeowner willing to spend a weekend on it. The combination of lower heating and cooling bills, available federal tax credits, and potential utility rebates means the effective payback period can drop below three years in many climates, with the thermal improvement lasting decades if the installation is done correctly and ventilation is preserved.
The process is genuinely achievable for most homeowners with basic tools and a methodical approach: prep the attic, seal every penetration, install baffles, blow to depth, verify coverage, and document your materials for tax purposes. Anyone working with knob-and-tube wiring, older recessed lighting, or complex HVAC configurations in the attic space should consult a licensed electrician or contractor before proceeding to make sure the insulation plan does not create a hazard or void any equipment warranties.
Frequently Asked Questions
Can I put new blown-in insulation on top of existing attic insulation?
Yes, in most cases you can blow new material directly over existing insulation as long as the old insulation is dry, free of mold, and not contaminated by pests. If existing insulation is wet, compacted heavily, or shows signs of mold, it should be removed before adding new material. You also need to air seal any newly visible penetrations before topping off, since adding depth without sealing leaks first provides limited benefit. The target is your climate zone’s recommended total R-value for the finished attic floor, so measure what you have and calculate the depth needed to reach that number with the new material.
How long does DIY attic insulation installation take?
For a typical 1,000- to 1,500-square-foot attic floor, most homeowners complete air sealing in two to four hours and blowing in another two to three hours, for a single-day project with an early start. Larger attics, heavily penetrated ceilings, or attics with difficult access can stretch the project into two days. Renting the blower for a full day rather than a half-day gives you the buffer to work carefully without rushing.
What R-value do I need for my attic in 2026?
The Department of Energy currently recommends R-49 to R-60 for attic floors in most of the continental United States, with R-38 being the minimum in the warmest southern climates and R-60 recommended for the coldest northern zones. Use the DOE ZIP code lookup tool to identify which climate zone applies to your address. If your existing insulation is already at R-30 or above, adding material to reach R-49 still typically provides a worthwhile reduction in heating and cooling costs.
Do I need a permit to insulate my own attic?
Most jurisdictions do not require a permit for adding insulation to an existing attic floor, but requirements vary by municipality. Some areas require a permit if you are also doing air sealing work that involves fire-rated assemblies, or if the project is part of a larger renovation. The safe approach is a quick call to your local building department before starting. If you are combining insulation with any electrical work, such as replacing recessed lights with airtight IC-rated fixtures, that portion of the project almost always requires a permit and inspection.
Can I claim the 25C tax credit if I buy materials in 2026 but finish the project in 2027?
No. The Section 25C credit is tied to the tax year in which the insulation is both purchased and placed in service (installed). If you buy materials in 2026 but do not complete installation until 2027, the credit applies to your 2027 tax return, not your 2026 return. Partial installations completed across two calendar years may be split between returns, but this requires careful documentation. When in doubt, consult a tax professional — see IRS Form 5695 instructions for the authoritative guidance.