If your energy bills feel out of control or your house never quite reaches a comfortable temperature, your attic may be the culprit. Air sealing and insulating your attic is one of the highest-impact home improvement projects you can tackle on a weekend, and it doesn’t require a contractor. According to ENERGY STAR’s Rule Your Attic program, homeowners can save an average of 15% on heating and cooling costs by air sealing and adding insulation in attics, floors over crawl spaces, and basements. For more projects like this, browse our DIY & Repair guides or explore all our Home articles.
This guide walks you through every step, from safety prep to finishing touches, so you can approach this project with confidence.
Key Takeaways
- Proper attic air sealing and insulation can reduce home energy bills by around 15% by limiting heat loss and air leakage.
- Air sealing must be completed before adding insulation to ensure the insulation achieves its full R-value performance.
- Key leak areas include soffits, plumbing stacks, electrical penetrations, recessed lights, and chimney gaps.
- Recommended DIY materials include caulk, spray foam, rigid foam board, and basic safety gear, with typical costs between $100–$300.
- Safe insulation levels depend on the climate zone, with colder regions requiring up to R-60 or more for optimal efficiency.
- Blown-in cellulose or fiberglass are the most practical and cost-effective attic insulation options for DIY homeowners.
- Homeowners may qualify for a federal tax credit of up to 30% of insulation and air sealing material costs under the 2026 energy efficiency program.
- Major risks include asbestos, mold, poor ventilation, or structural issues, which should always be assessed by a professional before DIY work begins.
Why Air Sealing Comes Before Insulation
Air sealing must happen before you add insulation because insulation alone does not stop air movement. Sealing gaps and penetrations first ensures your insulation performs at its rated R-value.
Many homeowners skip straight to adding insulation, but that approach leaves money on the table. Warm air rises and escapes through every crack, gap, and penetration in your attic floor, pulling conditioned air out of your living space in winter and letting hot attic air infiltrate in summer. The ENERGY STAR Attic Air Sealing Project guide identifies the most common leak locations: dropped soffits above kitchen cabinets, gaps around plumbing stacks, electrical boxes, recessed lights, and kneewall cavities. These are your primary targets.
What You’ll Need Before You Start
Gather your materials before climbing into the attic. You’ll need: caulk and a caulk gun, canned spray foam (both regular expansion and fire-rated), rigid foam board, foil tape, a utility knife, a staple gun, and safety gear including an N95 respirator, safety glasses, knee pads, and work gloves. Budget roughly $100 to $300 for air sealing materials on an average-sized home, depending on how many penetrations you’re sealing.
Safety Precautions You Cannot Skip
Attics present real hazards. Wear your N95 respirator from the moment you open the hatch, since older insulation can release fiberglass particles and dust. Step only on joists or a temporary plywood walkboard, never on the insulation itself or the drywall between joists. If your home was built before 1990 and you notice gray, pebble-like insulation, stop immediately. That material may be vermiculite and could contain asbestos. The ENERGY STAR guide strongly recommends leaving vermiculite undisturbed and consulting an abatement professional before proceeding.
Step-by-Step DIY Attic Air Sealing Guide
Work systematically across the attic floor, sealing large gaps with rigid foam and spray foam before moving to smaller cracks, so no penetration is missed before insulation goes in.
Step 1: Map Your Leak Locations
On a cold morning (or during summer when the attic is hot), move slowly across the attic floor with a flashlight. Look for daylight coming through gaps, discolored or compressed insulation (a sign air has been moving through it), and any penetration where a pipe, wire, or duct passes through the top plate. Mark each spot with a piece of painter’s tape so you don’t lose track once you’re working.
Step 2: Seal Large Gaps and Install Attic Baffles
Any opening wider than about half an inch — such as dropped soffit boxes and large plumbing chases — is best sealed with rigid foam board cut to fit, then finished with expanding spray foam around the edges to create an airtight seal.
⚠️ CRITICAL FIRE SAFETY WARNING: Chimney Gaps Never use rigid foam board, standard spray foam, or even fire-rated canned foam directly against a functional masonry or metal chimney. These materials are combustible and pose a severe fire hazard. To safely seal gaps around chimneys, you must bridge the opening using a non-combustible metal flashing (sheet metal) secured with a high-temperature, firestop sealant, and pack the remaining cavity strictly with unfaced rockwool (mineral wool) insulation.
⚠️ CRITICAL VENTILATION STEP: Do Not Block Your Soffit Vents When air sealing and insulating areas near the eaves, you must install plastic or cardboard rafter baffles (also called insulation dams or baffles). Install these directly against the roof decking between the rafters. They guarantee that the new insulation will not block the airflow coming from your soffit vents. Skipping this step breaks your attic’s natural ventilation loop, which inevitably leads to moisture buildup, wood rot in the rafters, and toxic mold growth.
Step 3: Seal Small Gaps and Penetrations
For wire penetrations, small pipe gaps, and cracks under 1/2 inch, caulk or regular expanding spray foam works well. Fill electrical box gaps from above using fire-rated caulk. For recessed lights, you have two options: install an insulation contact (IC) rated cover box from above and seal it with caulk, or replace the fixture with a sealed, IC-rated unit.
Do You Have Enough Insulation?
Once air sealing is complete, assess your current insulation. The U.S. Department of Energy’s insulation guidance offers a quick field test: if your attic insulation is below R-30 (roughly 10 to 13 inches of fiberglass batts), you likely need more. Pull back a small section in several spots to check depth and condition. Compressed or wet insulation should be removed and replaced rather than topped off.
Attic Insulation R-Value by Climate Zone
The right R-value for your attic depends on your climate zone, with colder climates requiring significantly thicker insulation to meet U.S. Department of Energy recommendations.
The Department of Energy’s insulation resource outlines recommended R-values by climate zone. Use the table below as your starting point.
| Climate Zone | States/Regions (Examples) | Recommended Attic R-Value (Uninsulated) | Recommended Attic R-Value (Existing 3-4″ Insulation) | Approx. Blown-In Depth Needed |
|---|---|---|---|---|
| Zone 1-2 (Hot) | Florida, Hawaii, southern Texas | R-30 to R-49 | R-25 to R-38 | 8-13 inches |
| Zone 3 (Mixed-Hot) | Georgia, Alabama, northern Texas | R-30 to R-60 | R-25 to R-38 | 10-14 inches |
| Zone 4 (Mixed) | Virginia, Kentucky, Oregon coast | R-38 to R-60 | R-38 | 13-19 inches |
| Zone 5-6 (Cold) | Ohio, Pennsylvania, Colorado, Ontario | R-49 to R-60 | R-38 to R-49 | 16-21 inches |
| Zone 7-8 (Very Cold/Arctic) | Minnesota, Alaska, northern Canada | R-49 to R-60+ | R-49 | 19-22+ inches |
Choosing Your Insulation Type
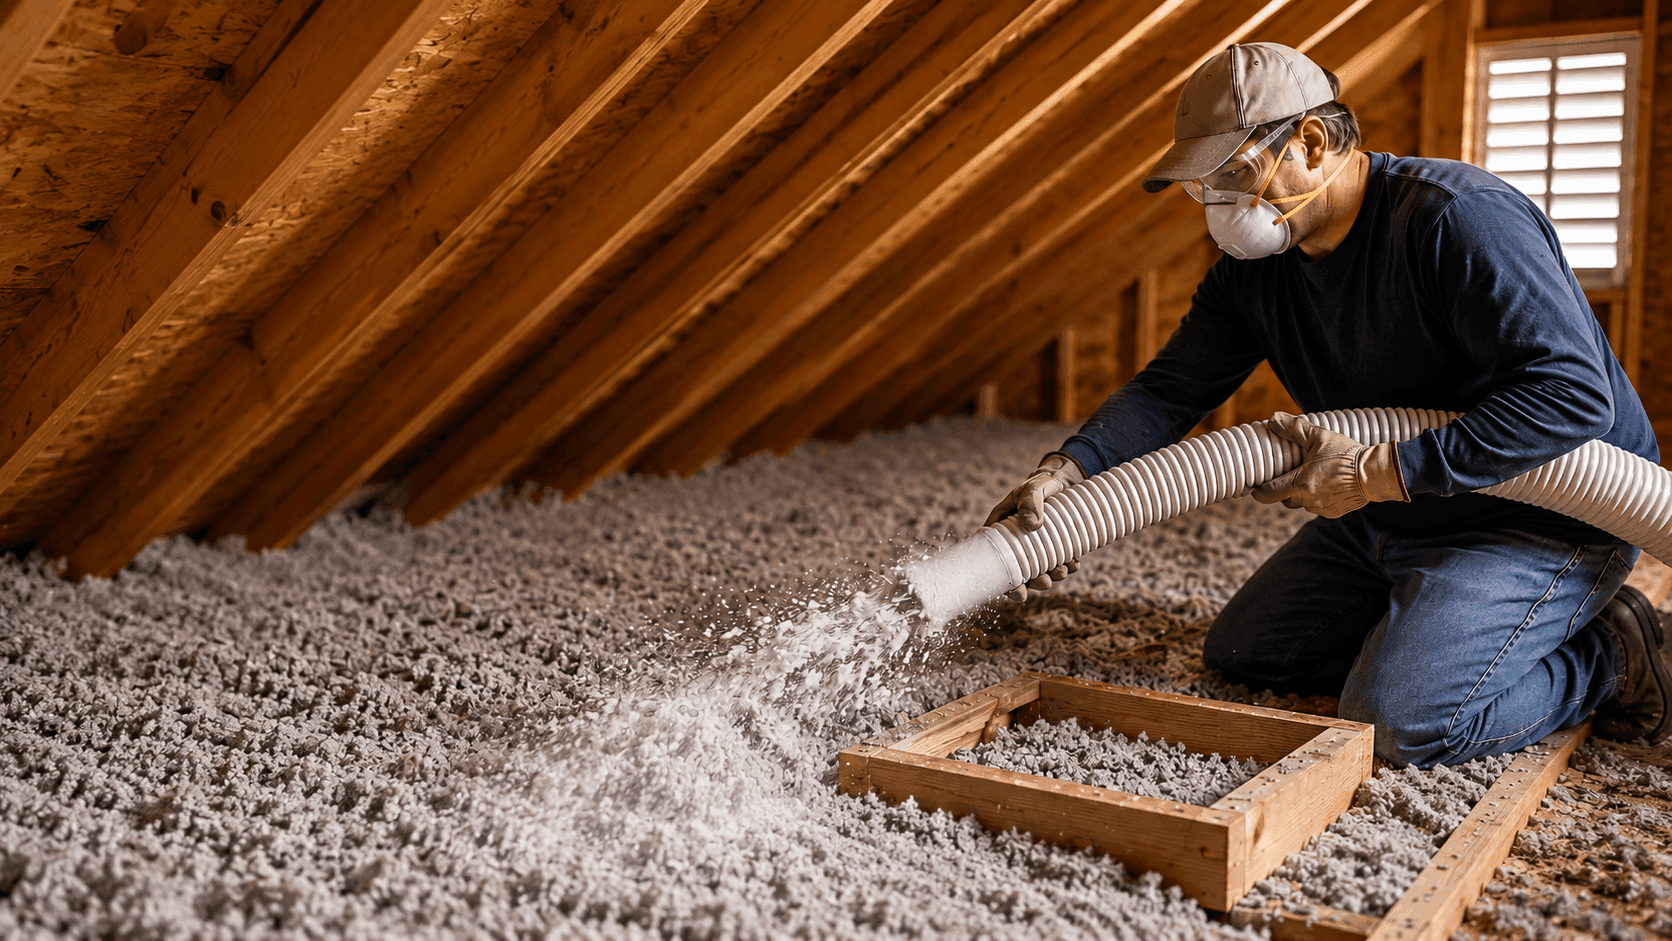
Blown-in cellulose and blown-in fiberglass are the two most practical choices for attic floors, especially when adding insulation on top of existing material. Both can be rented as machine-and-bag packages from home improvement stores, typically in the range of $200 to $500 for an average attic when you supply the labor. Fiberglass batts work well for initial installations or for insulating between joists before blowing in a second layer. Spray foam is best reserved for air sealing duties rather than bulk insulation, due to its higher cost per R-value.
Can You Pair This Project with Smart Home Upgrades?
Adding insulation becomes even more effective when combined with programmable or smart thermostats, which can optimize heating and cooling schedules to match your newly efficient attic envelope.
Once your attic is sealed and insulated, your HVAC system doesn’t have to work as hard to maintain temperature. This is a good moment to explore smart home energy management options, since a properly insulated home responds more predictably to thermostat scheduling, and the energy savings compound.
“According to ENERGY STAR, a program of the U.S. Environmental Protection Agency, the average American family spends more than $2,000 a year on home energy bills, and a significant portion of that energy is lost through air leaks and insufficient insulation in the building envelope.”
The 2026 Attic Insulation Tax Credit: What to Know
The federal Energy Efficient Home Improvement Credit may cover up to 30% of insulation and air sealing material costs, with an annual cap, for qualifying primary residences in tax year 2026.
Under the Inflation Reduction Act, the Energy Efficient Home Improvement Credit (Section 25C) offers homeowners a credit of up to 30% of the cost of qualifying insulation materials and air sealing products, up to $1,200 per year. This applies to materials purchased for your primary residence. Labor costs are generally not included for insulation, but air sealing air barrier materials may qualify. According to the Internal Revenue Service, you’ll need to save your receipts and manufacturer certification statements to claim the credit. Consult a tax professional to confirm eligibility for your specific situation, since rules can change and individual circumstances vary.
“According to the U.S. Department of Energy, adding insulation and sealing air leaks in existing homes is typically one of the most cost-effective energy efficiency improvements available, with payback periods that often range from two to five years depending on climate zone and energy prices.”
When Should You Hire a Professional Instead?
Certain attic conditions, including asbestos, mold, structural damage, or complex HVAC ductwork, call for professional assessment before any DIY work begins.
DIY attic work is well within reach for most homeowners, but there are situations where calling a professional is the right call. If you find mold, signs of pest infestation, damaged rafters, or that suspected vermiculite insulation, stop and get a professional evaluation. Similarly, if your attic contains a lot of exposed HVAC ductwork that needs sealing and rebalancing, an HVAC technician’s involvement may be worth the cost to avoid inadvertently creating pressure imbalances in your system. The ENERGY STAR DIY Sealing and Insulating Guide also notes that low-income households may qualify for free professional weatherization services through the federal Weatherization Assistance Program.
Alternative Perspectives
While most energy efficiency organizations strongly recommend DIY attic air sealing as a high-value project, some building science professionals caution that poorly executed air sealing can sometimes create unintended consequences. For example, dramatically tightening a home without assessing ventilation may increase indoor humidity or concentrate pollutants if mechanical ventilation is inadequate. Some contractors also argue that a professional blower door test before and after the project is the only reliable way to confirm that air sealing efforts actually reduced infiltration by a meaningful amount. On the other side, many experienced DIYers and energy auditors point out that even imperfect sealing of major bypasses produces measurable improvements, and that the cost barrier of professional services prevents many households from taking any action at all. Both perspectives have merit, and the right approach depends on your home’s age, ventilation setup, and existing air quality concerns.
Completing your attic is a great first step in a broader whole-home maintenance routine. Once you’ve tackled this project, consider pairing it with other deep-clean and refresh tasks, like learning how to steam clean your home, as part of a seasonal maintenance checklist that keeps your home healthy and efficient year-round.
Frequently Asked Questions
In most U.S. jurisdictions, adding blown-in or batt insulation to an existing attic does not require a permit, but requirements vary by location. Air sealing work is typically exempt as well. Always check with your local building department before starting, especially if you are altering ventilation pathways or working near electrical components.
For an average home with a straightforward attic, plan for a full weekend: roughly four to six hours for air sealing on day one, and another four to six hours for insulation on day two. Larger attics, more penetrations, or difficult access points can extend the timeline. Having a helper makes the blown-in insulation process significantly easier and faster.
Generally yes, as long as the existing insulation is dry, not compressed into a thin layer, and free of mold or pest contamination. Blown-in insulation can be added directly on top of existing fiberglass batts or older blown-in material. If the old insulation is wet or moldy, it should be removed and the source of moisture addressed before you add anything new.
Air sealing stops the bulk movement of air through gaps and penetrations, which is the primary driver of energy loss and moisture intrusion. A vapor barrier or vapor retarder slows the diffusion of moisture through building materials. In most attic situations, proper air sealing is far more important than adding a vapor barrier, and in some climates a vapor barrier in the wrong location can actually trap moisture and cause damage. Consult your local building code for guidance specific to your climate zone.