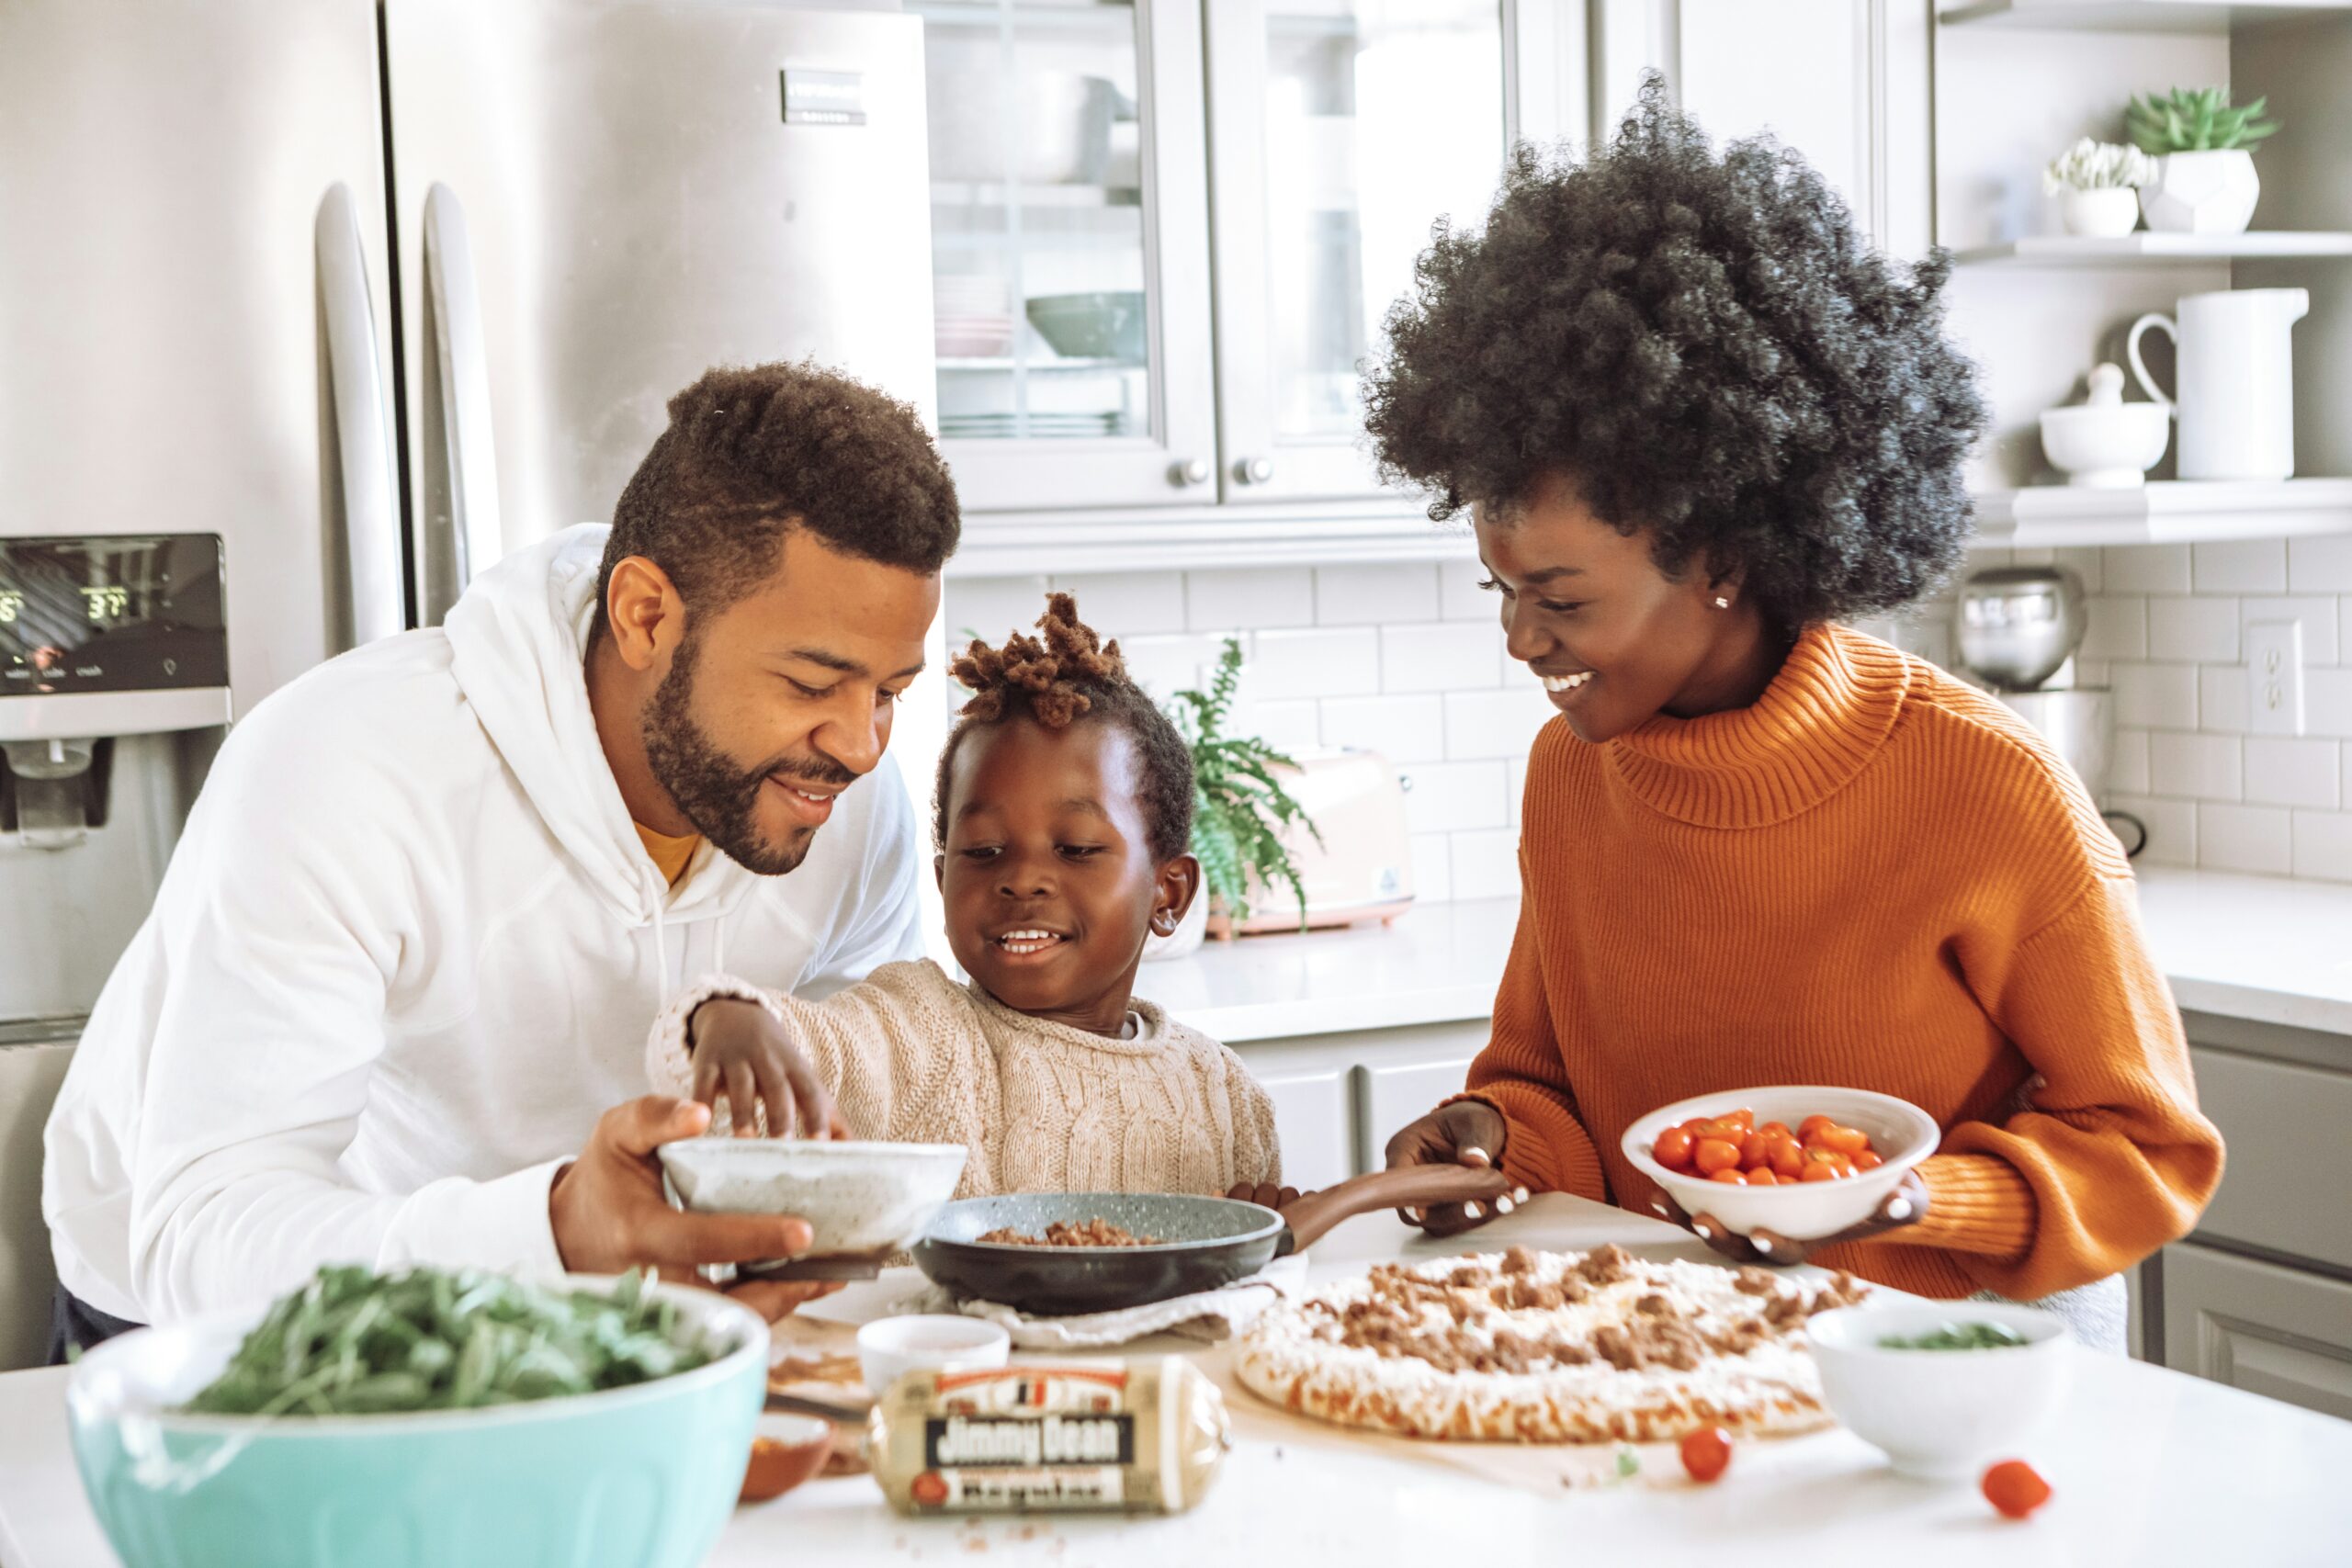
A homemade ginger shot recipe combines freshly juiced ginger root with lemon juice and optional add-ins like turmeric or cayenne, yielding a concentrated 1 to 2 oz wellness shot you can make in under 10 minutes with a juicer or blender. A single shot delivers a potent dose of gingerols, the active compounds in ginger that research suggests may support digestion, reduce nausea, and help manage inflammation.
Key Takeaways
- One 1 oz ginger shot made from fresh ginger root contains roughly 10 to 15 mg of gingerols, the bioactive compounds most associated with ginger’s anti-inflammatory and digestive benefits.
- A juicer produces the smoothest shots, but a high-speed blender plus a fine mesh strainer or nut milk bag works just as well and costs nothing extra.
- Homemade ginger shots keep in an airtight glass jar in the refrigerator for up to 5 days, making batch prep the most practical approach for a daily routine.
- Adding fresh lemon juice (about 1 tablespoon per shot) brightens the flavor and contributes vitamin C, which may help with the absorption of other antioxidants in the shot.
- Store-bought ginger shots from brands like Pressed Juicery or Suja typically run $3 to $5 each, while homemade versions cost roughly $0.40 to $0.70 per shot depending on ginger prices at your local grocery store.
What Are Ginger Shots and Why Are People Taking Them?
Ginger shots are small, concentrated servings of fresh ginger juice, usually 1 to 2 oz, taken daily as a quick wellness ritual meant to deliver the root’s most potent compounds in one sharp, spicy sip.
If you’ve browsed the cold-pressed juice section of Whole Foods or scrolled through wellness content on Instagram, you’ve seen them: tiny brown bottles promising a serious kick of energy and gut support. Ginger shots have moved well beyond the health food niche into mainstream morning routines, and for good reason. Unlike ginger tea, which is diluted and slow to make, a shot concentrates the root’s bioactive properties into a form your body can process quickly.
The appeal also comes down to convenience. Once you understand the base ratio of ingredients, making a week’s worth of homemade ginger shots takes about 15 minutes on a Sunday afternoon. You get far more fresh ginger per serving than you’d find in a cup of tea, a supplement capsule, or even most smoothies. For a closer look at more quick prep ideas like this one, browse our recipes section, or explore more ideas across our Food articles.
The flavor profile is assertive: peppery, warm, and sharp with a lingering heat that comes from the gingerols and shogaols in fresh ginger root. Most people find it easier to drink when chased with a glass of water or a wedge of orange. Some find they genuinely look forward to it after the first week, once the initial intensity feels familiar rather than startling.
Ginger Shot Recipe Ingredients
The core ginger shot recipe needs just three ingredients: fresh ginger root, fresh lemon juice, and water, with optional boosters like turmeric, cayenne, or black pepper added based on your wellness goals.
Fresh ginger root is the non-negotiable starting point. Avoid dried ginger powder here since it lacks the moisture content needed for juicing and produces a gritty, unpleasant texture. Look for firm, plump ginger with tight skin at the grocery store or a farmers market. Older ginger tends to be drier and more fibrous, which reduces yield when juicing.
Here’s what you’ll need to make approximately 6 to 8 shots (a solid batch for the week):
- 6 oz (about 170g) fresh ginger root, scrubbed or peeled
- 3 tablespoons fresh lemon juice (roughly 1.5 lemons)
- 1/4 cup filtered water (for blender method only)
- Optional: 1 teaspoon ground turmeric or 1/2 inch fresh turmeric root
- Optional: 1/8 teaspoon cayenne pepper
- Optional: 1 small pinch of black pepper (enhances turmeric absorption)
- Optional: 1 teaspoon raw honey per shot, added at serving time
A note on peeling: you don’t have to. The skin of organic ginger is thin and edible. If you’re using conventional ginger, a light peel with a spoon (which navigates the knobby surface better than a vegetable peeler) is worth the extra 30 seconds. Either way, scrub the root thoroughly under cold water before you begin.
How to Make Ginger Shots: Two Methods
You can make homemade ginger shots with either a cold-press juicer for the cleanest result or a standard blender with a strainer for an equally effective approach that most home kitchens can manage right now.
Method 1: Using a Juicer (Recommended)
A cold-press or masticating juicer like the Omega NC900HDC or the Hurom H-AA produces the highest yield from ginger root and preserves the most enzymatic activity. Centrifugal juicers work too, though the heat generated can reduce some heat-sensitive compounds.
- Scrub or peel your ginger root and cut it into pieces small enough to fit your juicer’s feed tube, roughly 1 to 2 inch segments.
- Feed the ginger through the juicer slowly, using the tamper to keep it moving.
- Juice your lemons separately and add the juice directly to the ginger juice.
- If using turmeric root, run it through the juicer alongside the ginger.
- Stir in cayenne or ground turmeric if using the dried versions.
- Pour into a small glass jar with a tight-fitting lid and refrigerate immediately.
Yield: approximately 6 to 8 oz of concentrated liquid from 6 oz of ginger, which gives you 6 to 8 individual 1 oz shots.
Method 2: Using a Blender
This is the most accessible method for most home cooks and produces excellent results with the right straining technique.
- Peel and roughly chop your ginger into small chunks, about 1/2 inch pieces, to help the blender break it down completely.
- Add the chopped ginger and 1/4 cup filtered water to a high-speed blender like a Vitamix or NutriBullet.
- Blend on high for 60 to 90 seconds until you have a smooth, fibrous pulp.
- Pour the mixture through a fine mesh strainer set over a bowl, pressing the pulp firmly with the back of a spoon to extract as much juice as possible. A nut milk bag gives you even better extraction.
- Add fresh lemon juice and any optional add-ins, then stir to combine.
- Transfer to a sealed glass jar and refrigerate.
One common mistake with the blender method is skipping the pressing step. Simply pouring the mixture through a strainer without pressing the pulp leaves a significant amount of juice behind and noticeably reduces your yield. Spend 1 to 2 minutes really working the pulp against the strainer, and you’ll nearly double what you collect.
What Are Ginger Shots Good For? The Wellness Benefits
Ginger shots are most widely associated with digestive support, nausea relief, and anti-inflammatory effects, with human studies suggesting that regular ginger consumption may also help manage blood sugar levels and support immune function.
It’s worth being precise about what the research does and doesn’t say. Ginger has been studied extensively, and several of its effects are well-supported in clinical literature. Others are promising but based on smaller trials or animal models. Here’s where the evidence stands as of mid-2025:
Digestive support and nausea: This is ginger’s most well-documented benefit. According to the National Center for Complementary and Integrative Health (NCCIH), ginger has shown consistent effectiveness for nausea and vomiting associated with pregnancy and chemotherapy in multiple controlled trials. The mechanism involves gingerols acting on serotonin receptors in the digestive tract.
Anti-inflammatory properties: Gingerols and shogaols (which form when ginger is dried or cooked) inhibit the production of pro-inflammatory cytokines in laboratory and some human studies. Research published on PubMed suggests this effect may be meaningful for people with conditions like osteoarthritis, though it is not a replacement for prescribed treatment.
Blood sugar management: Several small studies suggest that regular ginger consumption may modestly improve fasting blood sugar and HbA1c levels in people with type 2 diabetes, though the shot format has not been studied in isolation from other dietary factors.
Immune support: Ginger contains antioxidants including beta-carotene and capsaicin-adjacent compounds that are associated with immune function. The evidence here is less direct, and the term “immune boosting” is considered an overstatement by most registered dietitians. “May support normal immune function” is the more accurate framing.
The practical takeaway is that a daily ginger shot is a low-risk, high-flavor addition to an existing healthy routine. It is not a cure or a guaranteed intervention. Most of the well-supported benefits are dose-dependent, and a consistent daily habit over several weeks is more likely to show results than a one-off shot.
Ginger Shot Variations and Add-In Combinations
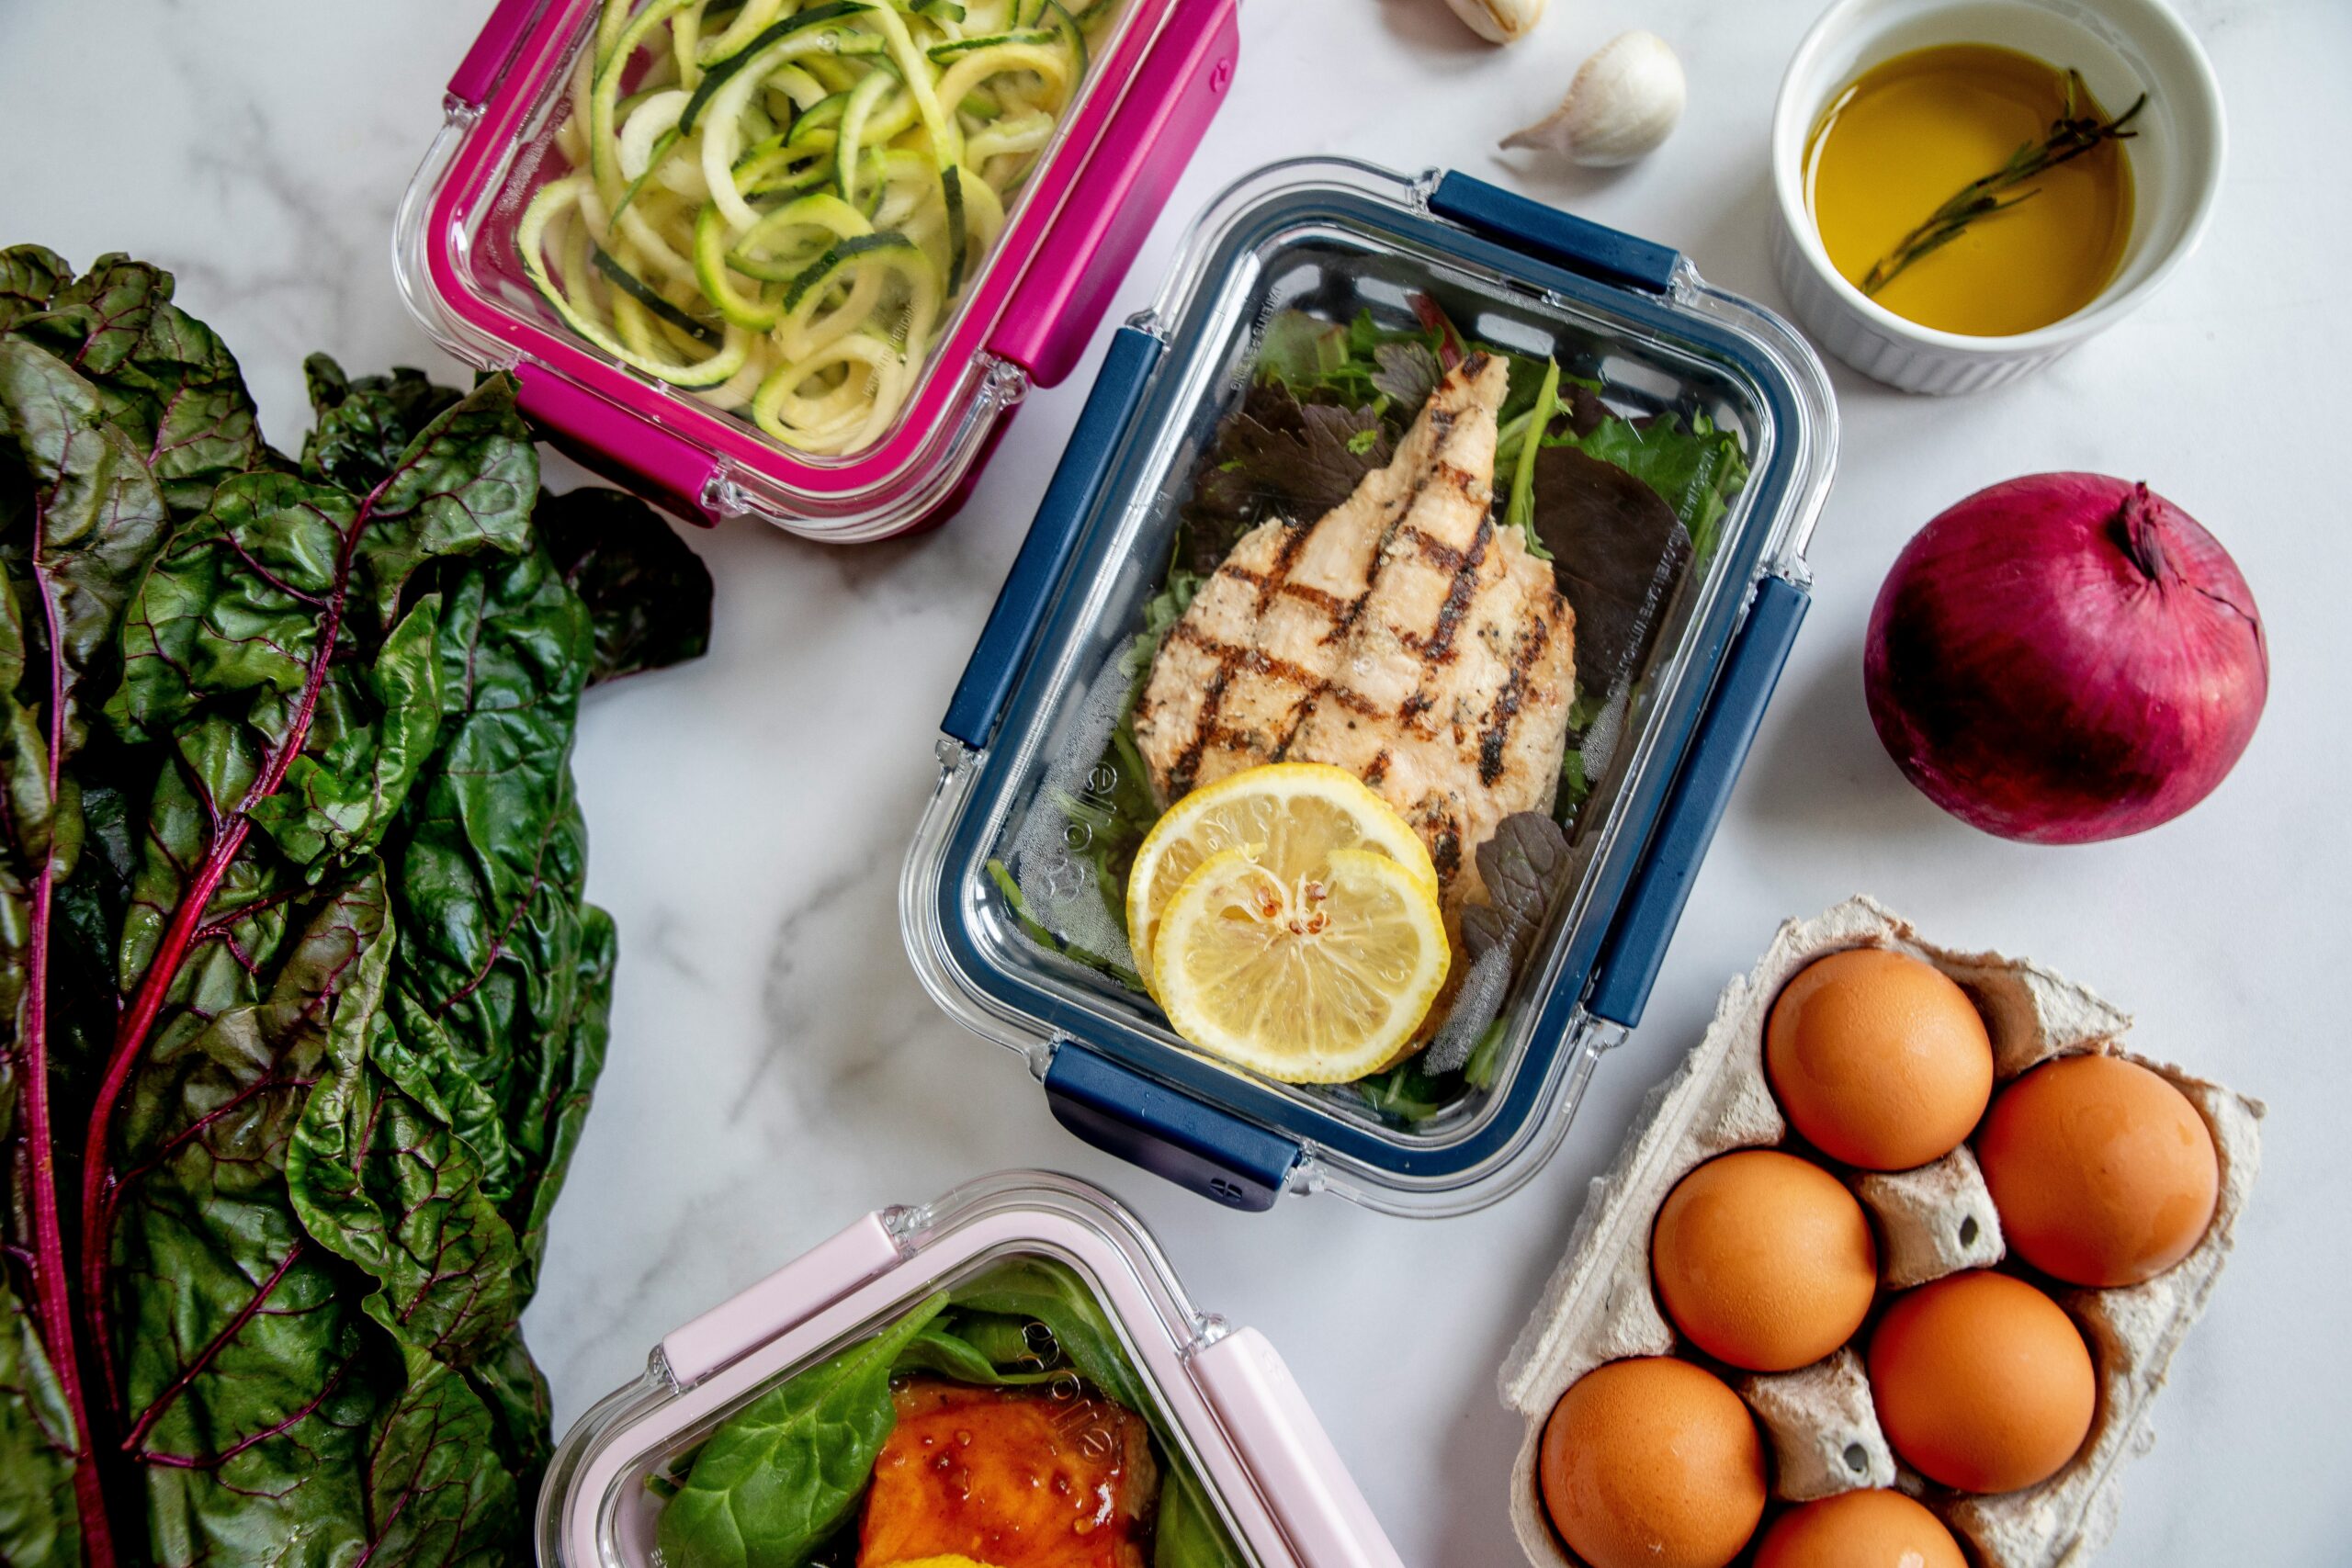
A basic ginger lemon shot is the most popular starting point, but adding turmeric, cayenne, apple cider vinegar, or orange juice creates distinct flavor profiles and targets different wellness goals.
| Variation Name | Key Add-In | Flavor Profile | Primary Wellness Association | Best For |
|---|---|---|---|---|
| Classic Ginger Lemon Shot | Fresh lemon juice | Sharp, citrusy, spicy | Digestion, nausea relief | Beginners, daily routine |
| Golden Wellness Shot | Fresh turmeric + black pepper | Earthy, warm, mildly bitter | Anti-inflammatory support | Joint comfort, post-workout |
| Ginger Cayenne Shot | Cayenne pepper (1/8 tsp) | Intensely hot, fiery | Circulation, metabolism | Cold mornings, energy boost |
| Ginger ACV Shot | Apple cider vinegar (1 tsp) | Tart, vinegary, sharp | Blood sugar management | Before meals |
| Ginger Orange Immunity Shot | Fresh orange juice (1 tbsp) | Bright, sweet, spicy | Vitamin C, immune support | Cold and flu season |
| Ginger Honey Shot | Raw honey (1 tsp per shot) | Sweet, warming, floral | Soothing for throat, antimicrobial | Sensitive palates, kids’ version |
How to Store Your Ginger Shots and Keep Them Fresh
Once you’ve made a batch of your ginger shot recipe, proper storage is what separates a week of vibrant, potent shots from a batch that loses its punch by day two. Ginger’s active compounds — particularly gingerols and shogaols — begin to degrade once the root is juiced, so minimizing exposure to air, light, and heat is essential.
Glass is your best friend here. Transfer your shots into small glass mason jars or a sealed glass bottle and refrigerate immediately after straining. Airtight glass containers preserve the volatile oils far better than plastic, which can absorb the sharp aromatics and slightly alter the flavor over time. Stored this way, your ginger shots will stay fresh and potent for up to five days in the refrigerator.
If you want to prep further in advance, freezing works surprisingly well. Pour individual shot portions into an ice cube tray, freeze until solid, then transfer the cubes to a labeled zip-lock bag. Frozen ginger shots retain most of their bioactive compounds for up to three months. The morning of, simply drop a cube into a small glass at room temperature for ten to fifteen minutes, or add it directly to warm (not boiling) water to thaw quickly. Avoid microwaving, as high heat breaks down heat-sensitive enzymes and diminishes some of the anti-inflammatory benefits.
One practical storage tip worth noting: always shake or stir your shot before drinking. Natural separation occurs as the juice settles, and the most concentrated portion of ginger solids sinks to the bottom. A quick swirl ensures you’re getting the full benefit of every sip rather than a watery first half and a thick, spicy residue at the end.
Labeling your batches with the preparation date takes only a second and prevents the guesswork of trying to remember whether that jar in the back of the fridge is two days old or six. A small strip of masking tape and a marker is all you need to build this habit into your weekly prep routine.
When and How Often to Take Ginger Shots for Best Results
The ginger shot recipe you’ve perfected is only half the equation. When and how consistently you take it determines how much of the wellness benefit you actually experience. Unlike pharmaceutical supplements with rigid dosing windows, ginger shots offer some flexibility, but there are timing strategies backed by how ginger interacts with your digestive system and metabolism.
Most people find that taking a ginger shot first thing in the morning on an empty stomach delivers the most noticeable effect. Without food in the system, ginger’s active compounds absorb more quickly into the bloodstream, and the thermogenic warming effect — that familiar internal heat ginger produces — kicks in faster. This makes morning the preferred window for those using ginger shots primarily for energy, metabolism support, or mental clarity before a workout or a demanding workday.
That said, some individuals find that straight ginger on an empty stomach causes mild irritation, especially if they’re prone to acid reflux or have a sensitive digestive tract. For those people, taking the shot about fifteen to twenty minutes after a light breakfast reduces any discomfort while still allowing reasonable absorption. The key difference in outcome is modest, and consistency matters far more than perfect timing.
For digestive benefits specifically, taking a ginger shot about twenty to thirty minutes before a large meal may help prime digestive enzyme activity and reduce post-meal bloating. This timing is particularly relevant for the apple cider vinegar variant listed in the comparison table above, which is often used as a pre-meal ritual.
In terms of frequency, one shot daily is the standard recommendation used in most observational studies on dietary ginger intake. Two shots per day is not harmful for most healthy adults, but there is a practical ceiling to benefit — more ginger does not linearly increase the effect and can cause heartburn or loose stools in sensitive individuals when consumed in excess. Starting with one shot daily for at least two to three weeks gives your body time to adapt and gives you a genuine sense of how ginger fits into your wellness routine before deciding to increase frequency.
What to Do with Leftover Ginger Pulp (Zero-Waste Uses)
After straining your ginger shots, most recipes tell you to toss the pulp. But that fibrous, fragrant leftover is still loaded with flavor, essential oils, and dietary fiber. Rather than sending it straight to the compost bin, here are five practical ways to put it to use.
1. Freeze it for stir-fries and soups. Spread the pulp in a thin layer on a parchment-lined tray, freeze until firm, then break it into portions and store in a labeled freezer bag. A spoonful added directly to a hot wok or simmering broth delivers a sharp ginger flavor without any extra prep. Because the juicing process has already broken down much of the cell structure, frozen ginger pulp actually distributes more evenly through sauces than freshly grated ginger does.
2. Brew it into a digestion tea. Simmer one to two tablespoons of fresh or frozen ginger pulp in two cups of water for ten minutes, then strain and serve. Add a squeeze of lemon and a small amount of raw honey if desired. This produces a warming, mildly spicy tea that supports digestion after heavy meals and is gentle enough for evenings when you want the benefits of ginger without the intensity of a raw shot.
3. Dehydrate it into homemade ginger powder. Spread the pulp thinly on a dehydrator tray or a parchment-lined baking sheet and dry at the lowest oven setting (around 170°F or 75°C) for four to six hours until completely moisture-free and crumbly. Once cooled, blend or crush into a fine powder and store in an airtight spice jar. Homemade ginger powder has a noticeably more complex, slightly smoky flavor compared to store-bought, and you know exactly what’s in it.
4. Mix it into baked goods. Ginger pulp folds naturally into muffin batter, banana bread, energy balls, or granola. Because most of the sharp volatile compounds have already been extracted into the juice, the remaining pulp offers a milder, slightly fibrous ginger note that complements sweet baked recipes without overwhelming them. Start with one to two tablespoons per batch and adjust to taste.
5. Combine it into a DIY exfoliating scrub. Ginger’s anti-inflammatory and circulatory properties translate beyond the kitchen. Mix ginger pulp with coarse sugar and a small amount of coconut oil for a simple body scrub. The texture of the fibrous pulp adds gentle exfoliation, and the essential oils in ginger leave skin feeling warmed and refreshed. Use within a few days and keep refrigerated between uses.
Building a zero-waste habit around your ginger shot routine takes almost no extra time once the process becomes familiar. Keeping a dedicated container in your freezer for pulp accumulation means you’ll always have a supply ready for whichever use fits the week.
“Gingerols, the primary pungent ingredients of ginger, have been shown to exert variety of powerful biological activities including anticancer, anti-inflammatory, and antioxidant properties. Clinical data confirms its high efficacy in accelerating gastric emptying and treating various forms of nausea. “
— Nutrients Journal, Comprehensive Systematic Review of 109 Randomized Controlled Trials (PMC7518412)
“Gingerol, a natural component of ginger root, benefits gastrointestinal motility — the rate at which food exits the stomach and continues along the digestive process. Eating ginger encourages efficient digestion, which can naturally relieve the discomforts of bloating, gas, and nausea. “
Building a consistent ginger shot habit is a small daily practice whose value compounds over time. The core recipe is deliberately uncomplicated, giving you a week’s worth of potent, anti-inflammatory shots for a fraction of the cost of store-bought alternatives. By sticking to a daily routine and repurposing your leftover pulp, what begins as a simple wellness trend transforms into a sustainable, zero-waste kitchen habit.
Frequently Asked Questions About the Ginger Shot Recipe
Yes, you can easily make ginger shots using a high-speed blender instead of a juicer. Add your peeled, roughly chopped ginger to the blender with a small amount of water (about two tablespoons per two-inch piece of root) and blend on high for 30 to 60 seconds. Pour the mixture through a fine mesh strainer or nut milk bag, pressing firmly to extract all the liquid. The yield is slightly lower than a cold-press juicer, but the resulting shot is equally potent.
Use one to two inches of fresh ginger root per single-ounce wellness shot. This amount yields approximately one to two teaspoons of raw, concentrated juice. Beginners should start at the lower end of the spectrum, as the intensity of fresh ginger can be surprisingly sharp. Once your palate and digestive system adapt, you can increase the ginger ratio to suit your tolerance.
Yes, one ginger shot daily is perfectly safe and well-tolerated for most healthy adults. According to the Mayo Clinic, up to 4 grams of ginger per day is considered a safe general range for dietary consumption. However, individuals who are pregnant, taking blood-thinning medications, or managing gallstones should consult a healthcare provider first, as high ginger intake can interact with certain medications.
Ginger shots lose their spicy kick because volatile gingerols gradually degrade during refrigerated storage. Over a few days, exposure to air and temperature shifts causes these active compounds to oxidize and break down. This chemical shift leaves older shots tasting flatter or more muted than a fresh batch. To experience the maximum potency and flavor, prepare smaller batches intended to last no more than five days.